

Oct 08, 2020
In my previous posts, we implemented conditional validations in Sitecore Forms where the validation messages appear just under the field that has the validation error. The solution in my first post is fully client-side, but it works only with fields on the same form page. The solution my second post is fully server-side, but it works only when one of the fields is on another form page. However, there might be situations where validations must be server-side only, without a strict requirement for where the validation errors are displayed. In this post, we will implement this scenario using Submit Actions.
What do you need?
The requirements are the same as those used in Parts 1 and 2.
How to implement?
We are going to perform the same validations we did for Part 1 (Other Number must be greater than Number) and Part 2 (Another Number must be less than Other Number). First, let’s create a couple of extension methods in our FormExtensions class to handle retrieving of field values:
FormExtensions.cs
namespace Oshyn.Forms.Samples.Extensions
{
    public static class FormExtensions
    {
        //... other methods ...

        public static string GetFormFieldValue(this FormSubmitContext formSubmitContext, string fieldName)
        {
            var field = formSubmitContext.Fields.FirstOrDefault(f => f.Name.Equals(fieldName));
            return field.GetFieldValue();
        }

        public static string GetFieldValue(this IViewModel field)
        {
            if (field == null)
            {
                return string.Empty;
            }

            if (!(field is DropDownListViewModel))
            {
                return field.GetType().GetProperty("Value")?.GetValue(field, null)?.ToString() ?? string.Empty;
            }

            var dropDownField = field as DropDownListViewModel;
            return dropDownField?.Value?.FirstOrDefault() ?? string.Empty;
        }
    }
}
Let’s create our custom Submit Action:
TestSubmitAction.cs
namespace Oshyn.Forms.Samples.SubmitActions
{
    public class TestSubmitAction : SubmitActionBase<string>
    {
        public TestSubmitAction(ISubmitActionData submitActionData) : base(submitActionData) { }

        protected override bool Execute(string data, FormSubmitContext formSubmitContext)
        {
            var isValid = true;

            var numberValue = formSubmitContext.GetFormFieldValue(“Number”);
            var otherNumberValue = formSubmitContext.GetFormFieldValue(“OtherNumber”);
            var anotherNumberValue = formSubmitContext.GetFormFieldValue(“AnotherNumber”);

            if (!CompareValues(otherNumberValue, numberValue, “>”))
            {
                formSubmitContext.Errors.Add(new FormActionError { ErrorMessage = “Other Number must be greater than Number.” });
                isValid = false;
            }

            if (!CompareValues(anotherNumberValue, otherNumberValue, “<“))
            {
                formSubmitContext.Errors.Add(new FormActionError { ErrorMessage = “Another Number must be less than Other Number.” });
                isValid = false;
            }

            //… any other logic for your submit action …

            return isValid;
        }

        //This override is REQUIRED when using string as the SubmitActionBase<> generic parameter.
        protected override bool TryParse(string value, out string target)
        {
            target = string.Empty;
            return true;
        }

        private bool CompareValues(string value1, string value2, string oper)
        {
            if (!double.TryParse(value1, out double val1))
            {
                return true;
            }

            if (!double.TryParse(value2, out double val2))
            {
                return true;
            }

            switch (oper)
            {
                case “<“ when (val1 < val2):
                case “<=“ when (val1 <= val2):
                case “>” when (val1 > val2):
                case “>=“ when (val1 >= val2):
                case “=“ when (val1 == val2):
                    return true;
            }

            return false;
        }
    }
}
Let’s analyze this class:
- It is a simple Submit Action class without a model, that’s why we set the generic parameter of SubmitActionBase<> to string. But for this to work, you MUST override the TryParse() method as shown.
- The Execute() method contains the validation logic:
- It extracts the values of the fields we are going to do the validations. We use the GetFormFieldValue() extension method we created previously, using the field name as the parameter (it must match the “Field name” value you entered for the field when creating it in the Forms Editor)
- It performs the comparisons using the private CompareValues() method. If the comparison fails, it will add a FormActionError (with the ErrorMessage property set to your custom validation error message) to the submit context’s Errors collection, and setting the isValid flag to false.
- It performs any other logic you might want for your custom Submit Action.
- If there were any errors, the isFlag would be set to false, and that would be returned by the Submit Action, so the Form displays the Validation Summary of errors. Otherwise, the submission will be successful.
Build and deploy your code to your Sitecore installation. Open Sitecore Content Editor, and navigate to /sitecore/System/Settings/Forms/Submit Actions. Create a new Submit Action using template /sitecore/templates/System/Forms/Submit Action. Fill the fields as what is shown here:
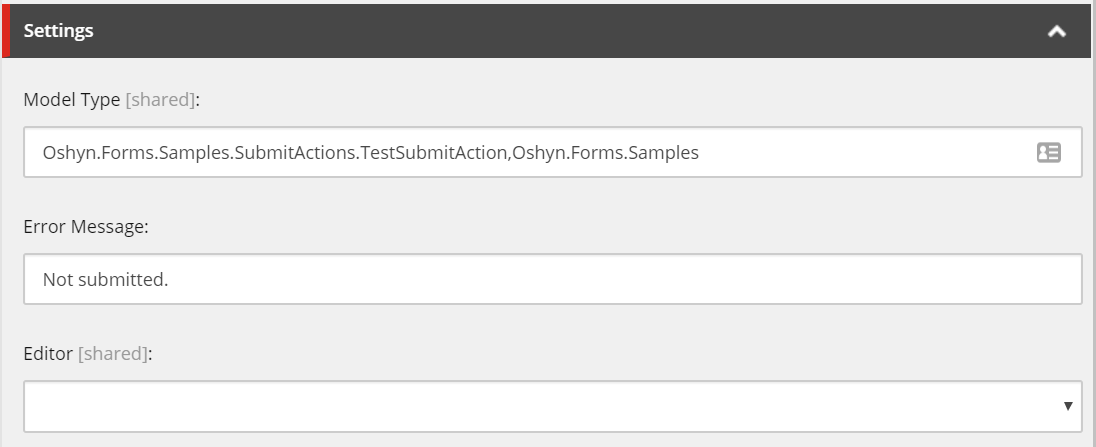
Model Type is the Submit Action’s fully qualified class name, so make sure you change it to whatever name, namespaces, and assembly you have used for your own class. The Error Message is an additional error message that will be displayed if the submission is not completed, you can leave this field empty if you don’t want it to appear.
Open the form in the Forms Editor, and select the final Submit button of the Form (the one before the Thank You page). Click on the Add dropdown button (the one with the “+” sign):
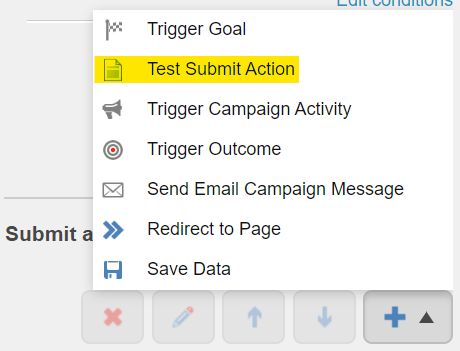
Select your custom Submit Action. Now it should appear on the list of Submit Actions for the button:
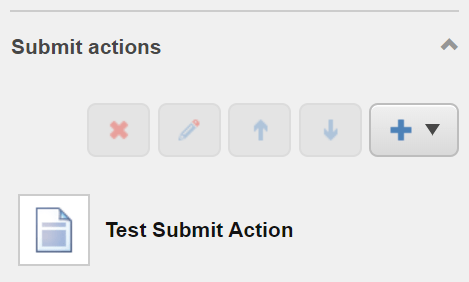
Click on Apply, and save the form.
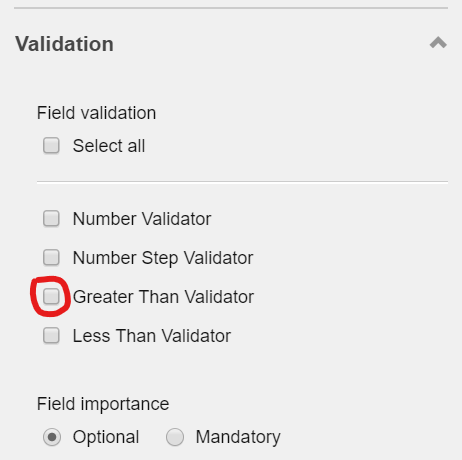
If you are using the form examples we used in Part 1 and Part 2, do the following: select the Other Number field and remove the “Greater Than Validator” validation in the Validation section on the right pane:
Click on Apply, and save the form. Look for the Another Number field, and also on the right pane side, under the Validation section, remove the “Less Than Validator”:
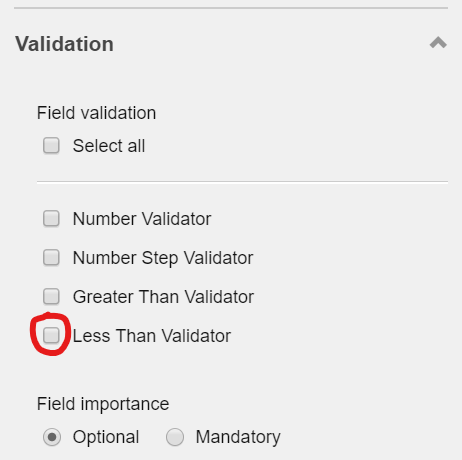
Click on Apply, and save the form.
Publish the form and the submit action, or do a full site Smart Publish. Open the form and start testing:
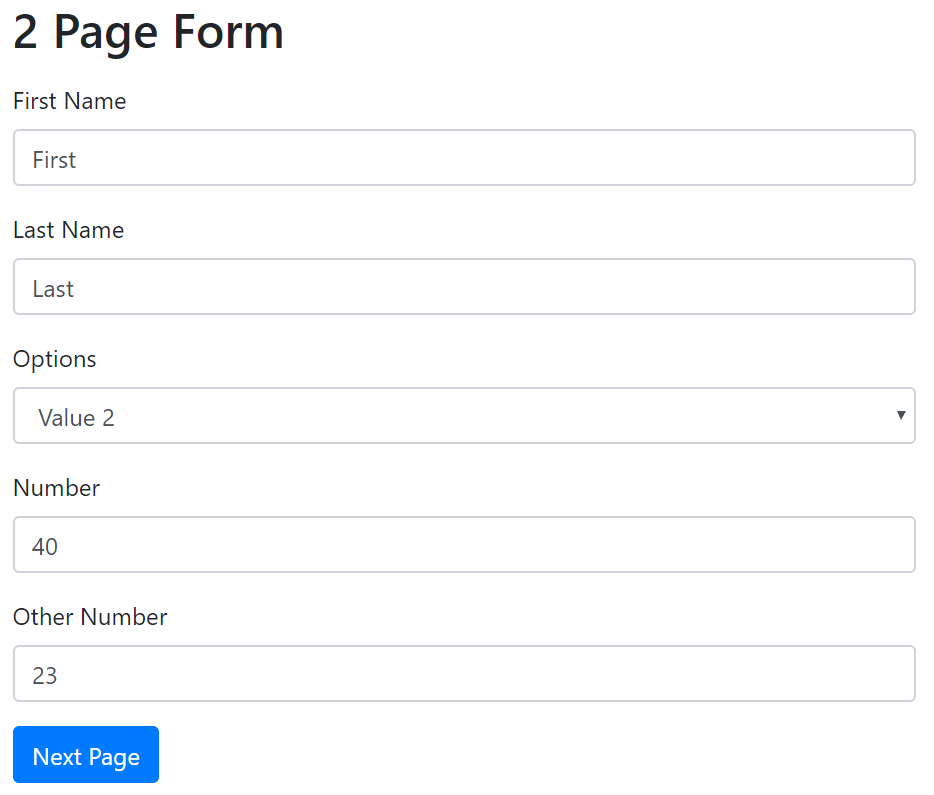
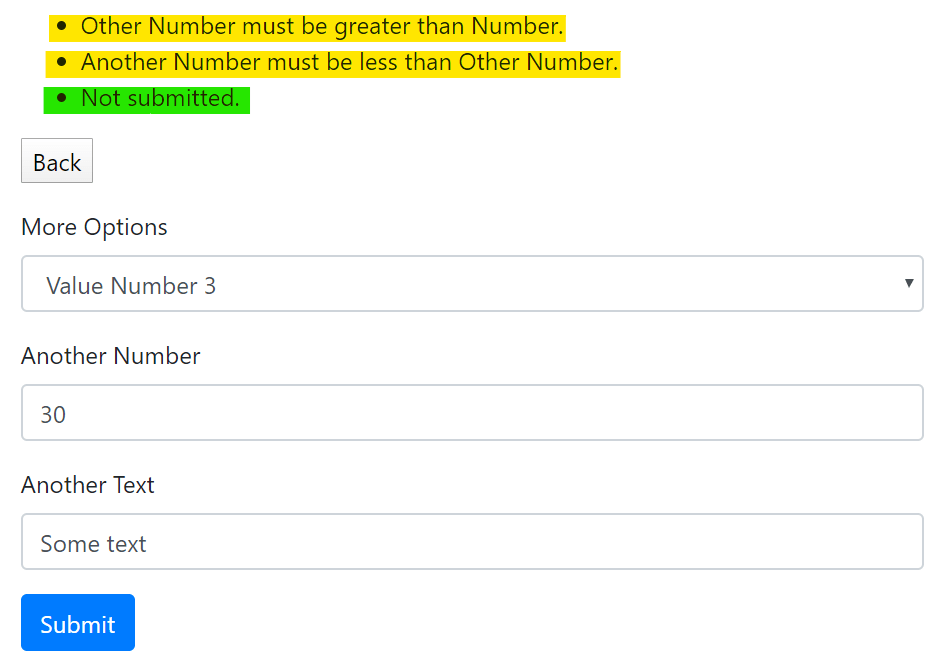
As you can see, if you enter values that do not validate, you will get (in the second page) a summary of validation errors (the one marked with green is the default validation error that you define in the Submit Action Sitecore item’s Message field). If you fix one of the values, you will get something like this:
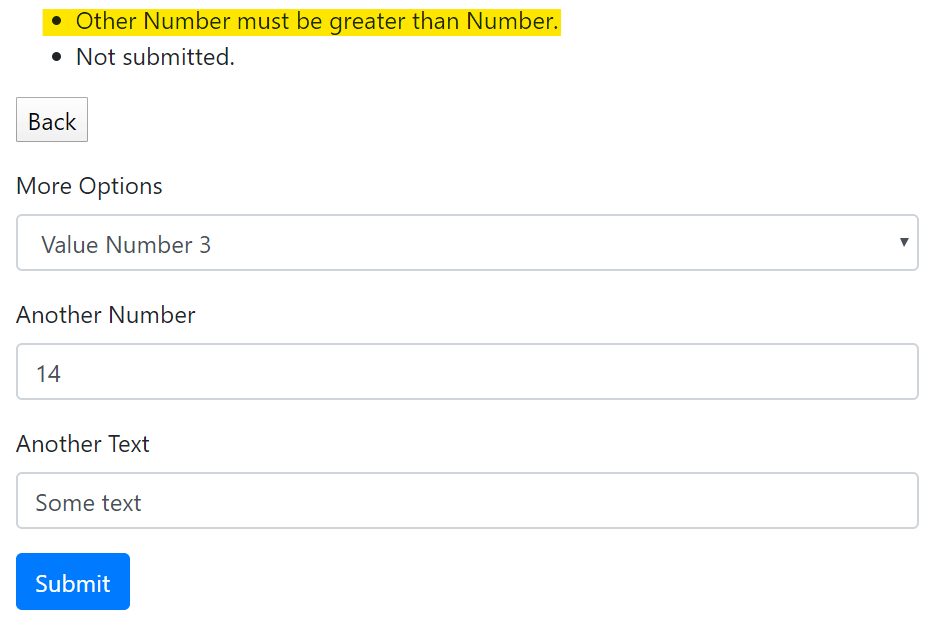
You’ll notice that one of the validation errors now does not appear. If you fix both, the form will be submitted and you will be redirected to the Thank You page.
Conclusion
This is possibly the easiest way to do conditional validations, without the need for custom JS or custom validators for each case or field combination. But it has the disadvantage of not showing the validation errors under the fields where they happen, so it impacts your UX. This is the conclusion of this series; now you have three options for conditional validation in Sitecore Forms that can be applied depending on your configuration, requirements, and UX.
Recent Insights
-

-

-

-

Oshyn Labs
Oshyn Digital Trust Index
2025 Benchmarking Report: Measuring the Foundations of Digital Reliability


