

Sep 18, 2023
Moving from Sitecore XM to Sitecore XM Cloud and developing projects using Next.js can be tricky, particularly working with placeholders and dynamic placeholders. So, to get you started and ensure the entire process goes smoothly, we'll explain some of the critical things you need to know about working with placeholders in Sitecore Pages.
Working With the Code
Let’s start with the Placeholder helper.
@Html.Sitecore().Placeholder("my-placeholder")
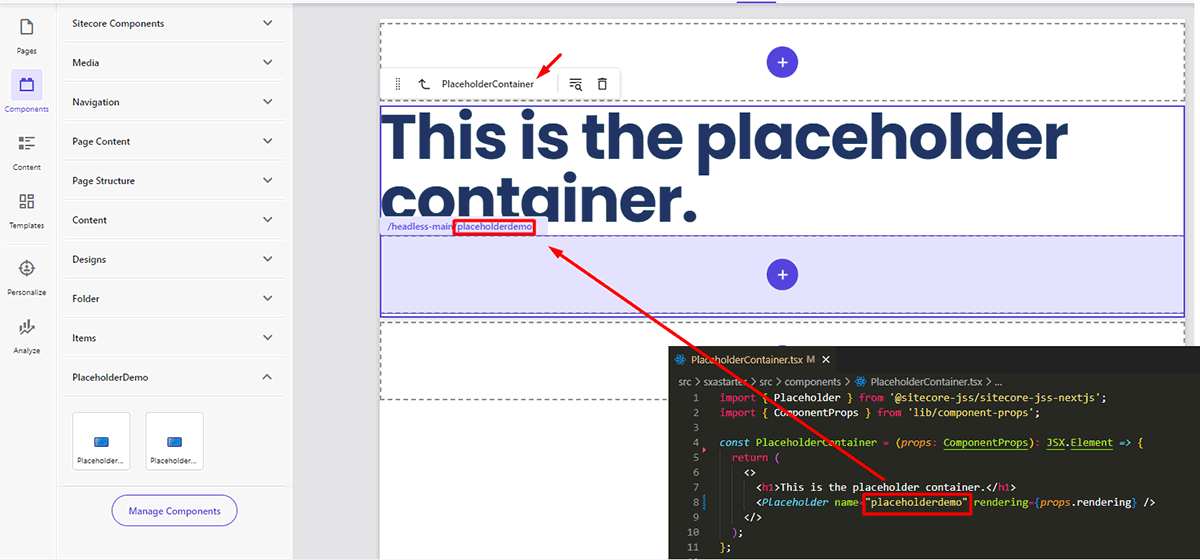
In Sitecore JSS, the <Placeholder> tag is the first introduction to working with placeholders. Here’s how the syntax of the functional component looks:
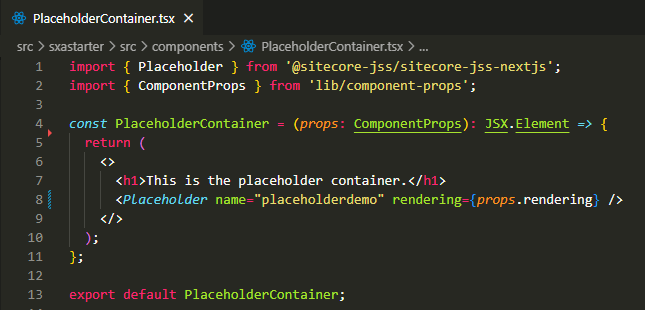
Let’s break down this code snippet:
The Placeholder component must be imported from Sitecore JSS and given a placeholder name to be referenced later on Sitecore items and pages.
Next, we need to provide some information about the content items to our component. Sitecore helps us with this by offering a handy object called "ComponentProps". Inside this object, you'll find a rendering parameter that can be imported from "lib/component-props".
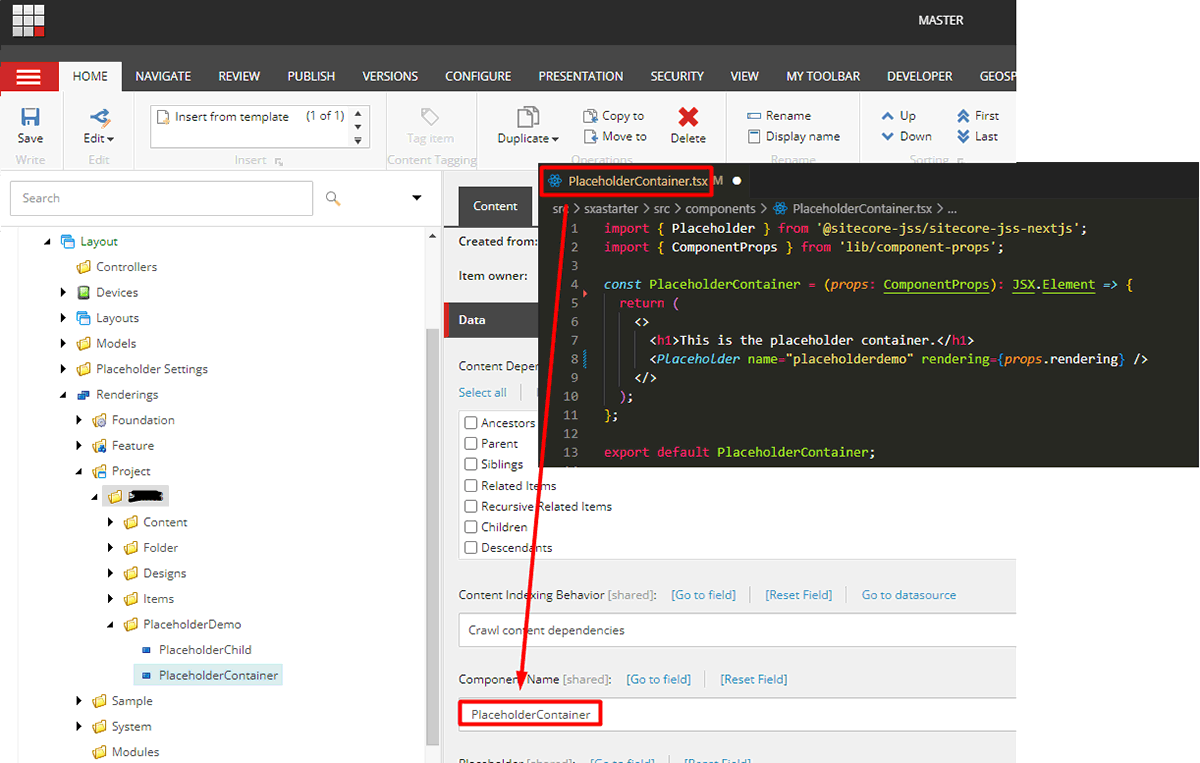
Next, give the .tsx file a clear and memorable name. You’ll need to remember this name for a later step when we configure the rendering in the Content Editor.
Setting the Json Rendering
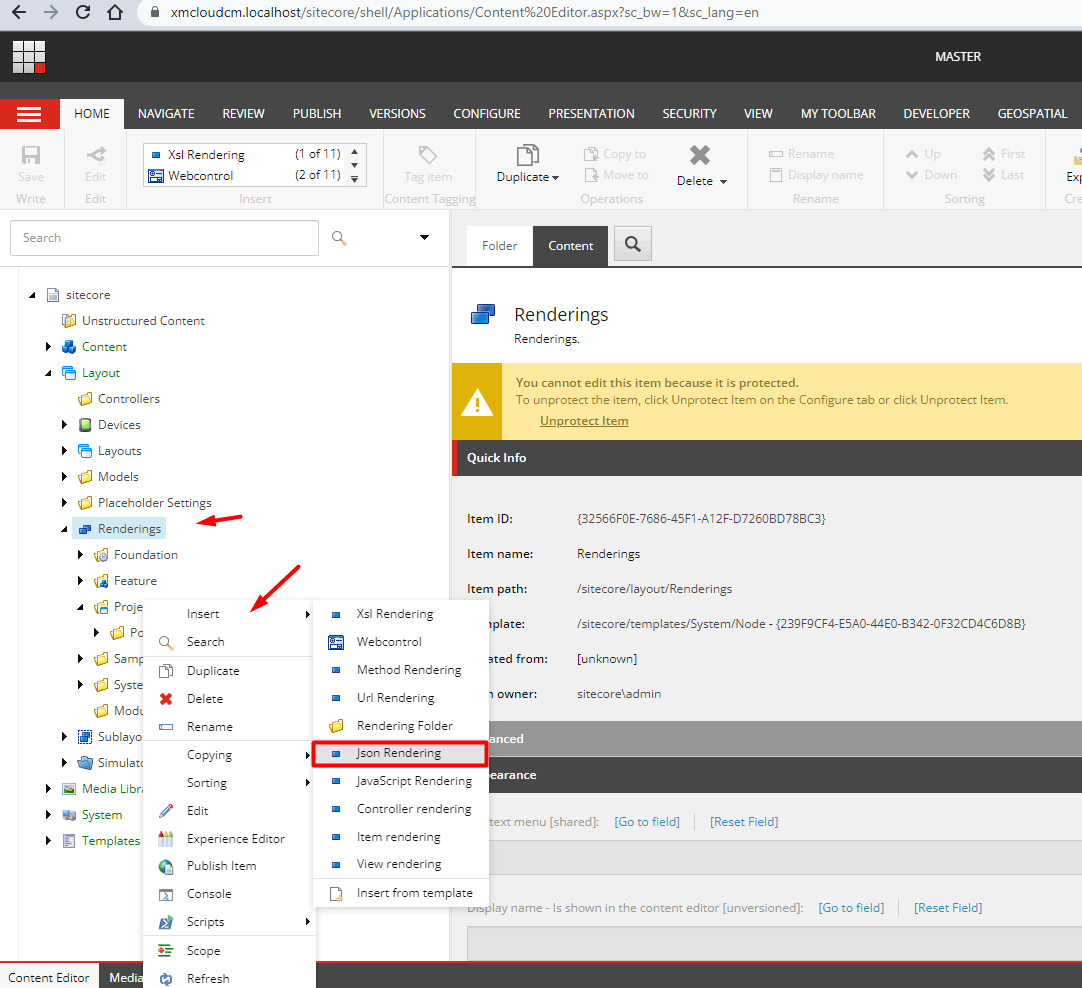
After completing our code, the next step involves creating a JSON Rendering. Think of this as a counterpart to the view and controller renderings used before. You'll find this within the Sitecore->Layout->Renderings section. You'll need to add a new JSON Rendering and assign a suitable name here.
NOTE: Ensure that the Component Name field in the JSON rendering corresponds with the name you assigned to the .tsx file in the earlier step. Typically, this field will automatically take the name you provided for the JSON Rendering.
Following this, it might seem like we've completed all the necessary placeholder configurations. However, there are still a few additional steps we need to address in order to ensure everything functions smoothly.
Creating Placeholders in Sitecore
Go to Sitecore->Layout->Placeholder Settings to generate a Placeholder item. This tells Sitecore that there is a placeholder to be used within our code.
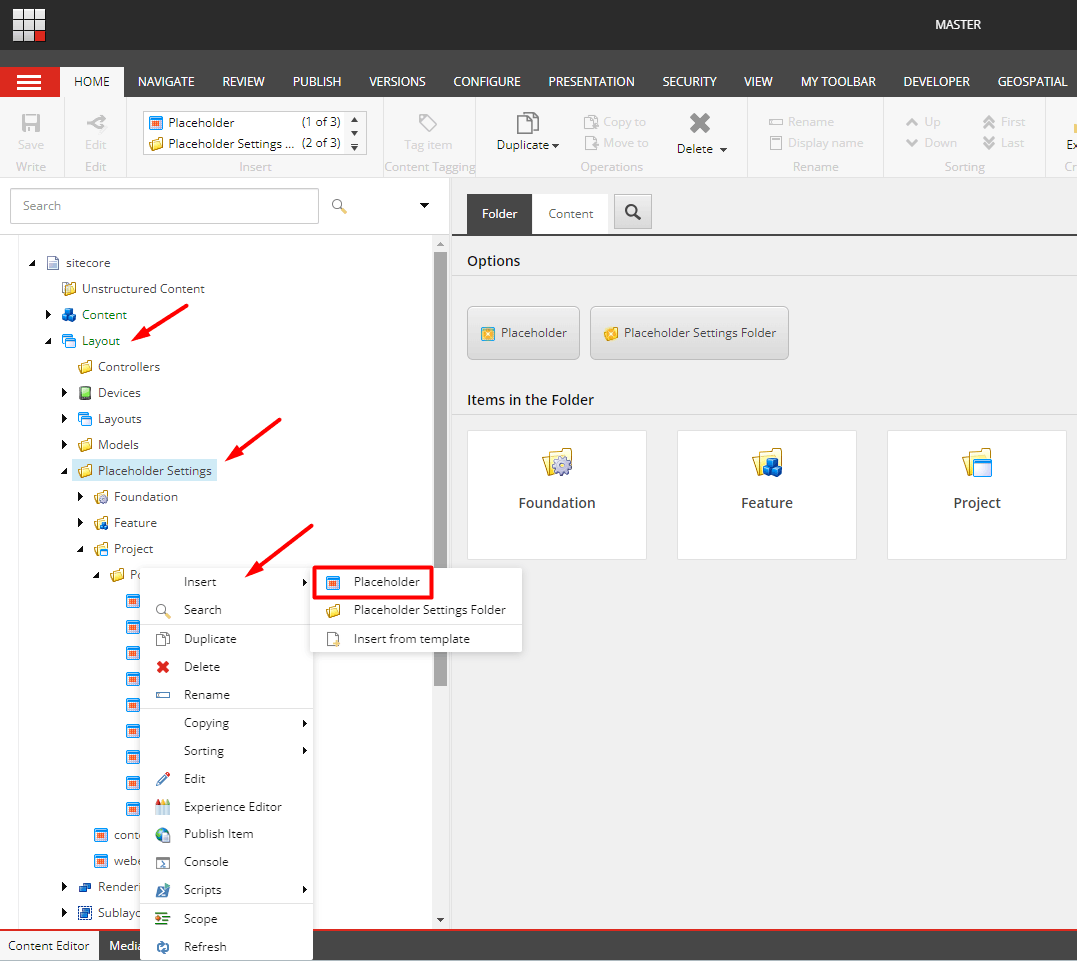
NOTE: The placeholder key's value should match the value we established in our Next.js code.
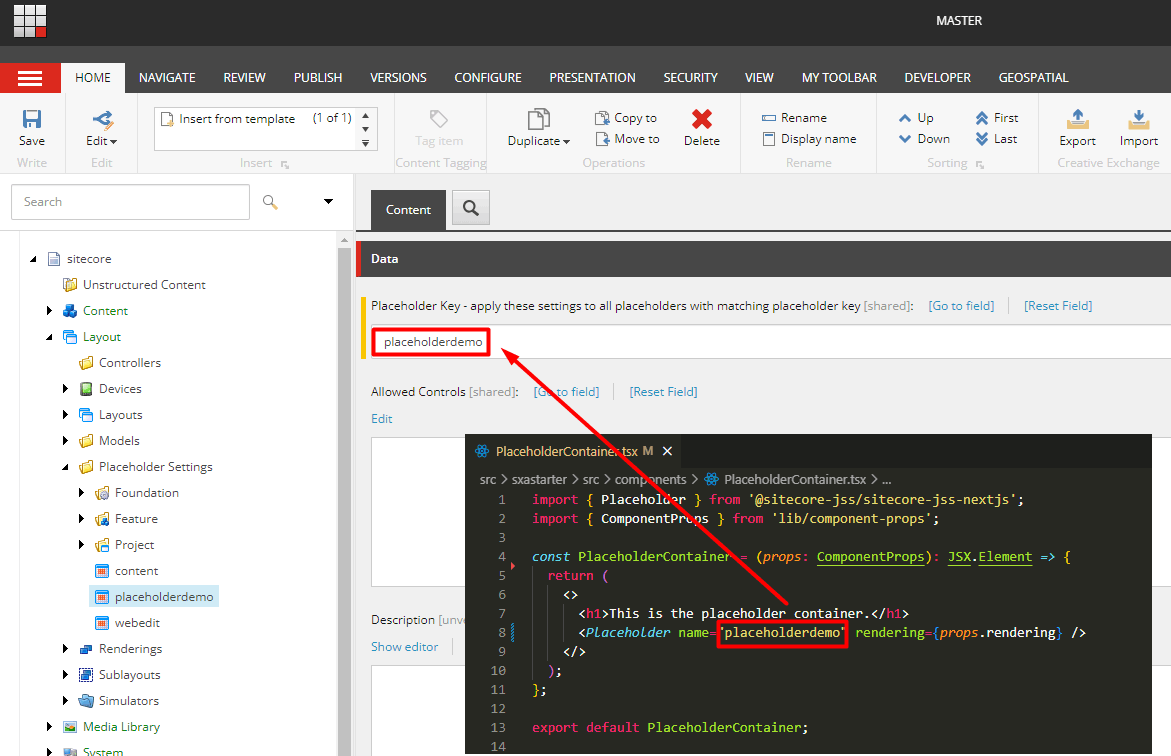
Lastly, we must connect the recently created "Placeholder Settings" item to the rendering we set up earlier. This allows the components to render within the designated placeholder.
Access the Rendering item and locate the Layout Service section to accomplish this. Locate and choose the "Placeholder Settings" item within the section's hierarchy. This establishes the link needed for proper rendering.
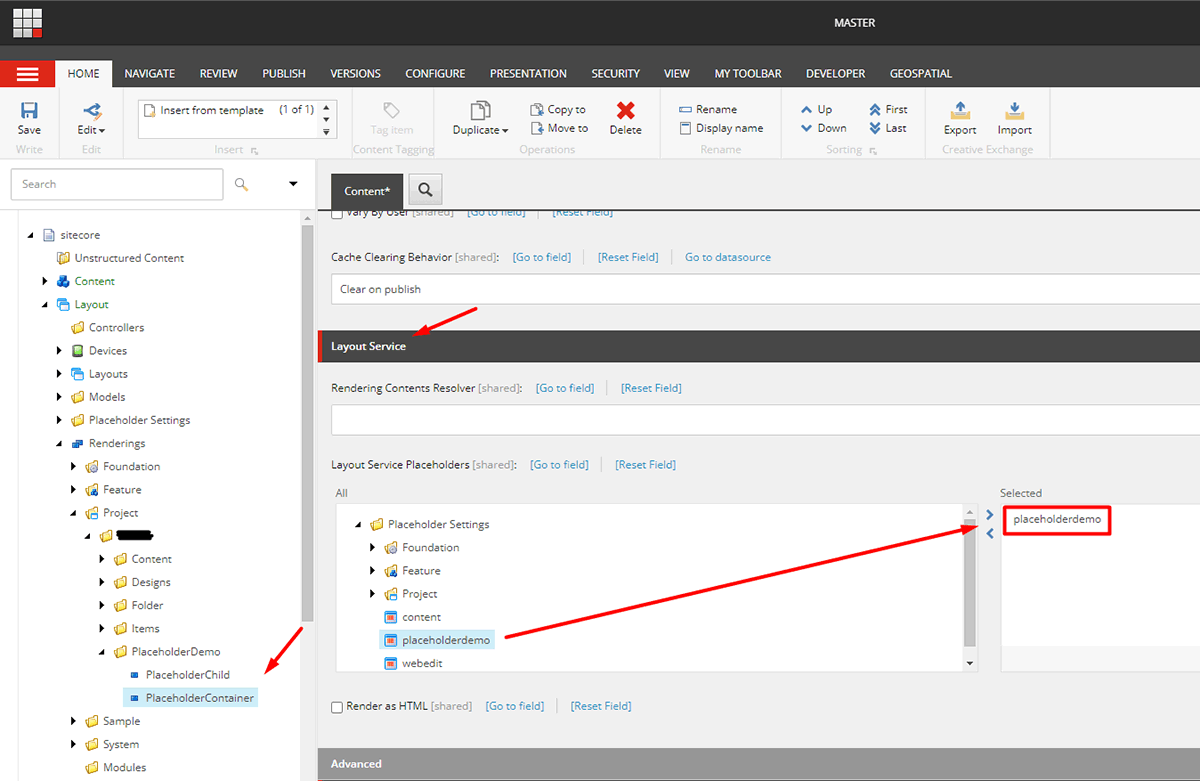
Using the Placeholder on Sitecore Pages
Next, we need to verify that the configuration was successful. Go to Sitecore Pages and perform a test (alternatively, you can use the Experience Editor).
Since we're following the SXA approach, we must enable our PlaceholderContainer rendering for Pages. To accomplish this, follow these steps:
Navigate through the Content tree and locate the Presentation item.
Within the Presentation item, access the Available Renderings item and choose Content.
In the Content section, modify the Renderings field.
Search for the previously created Rendering item (
PlaceholderContainer) and select it.
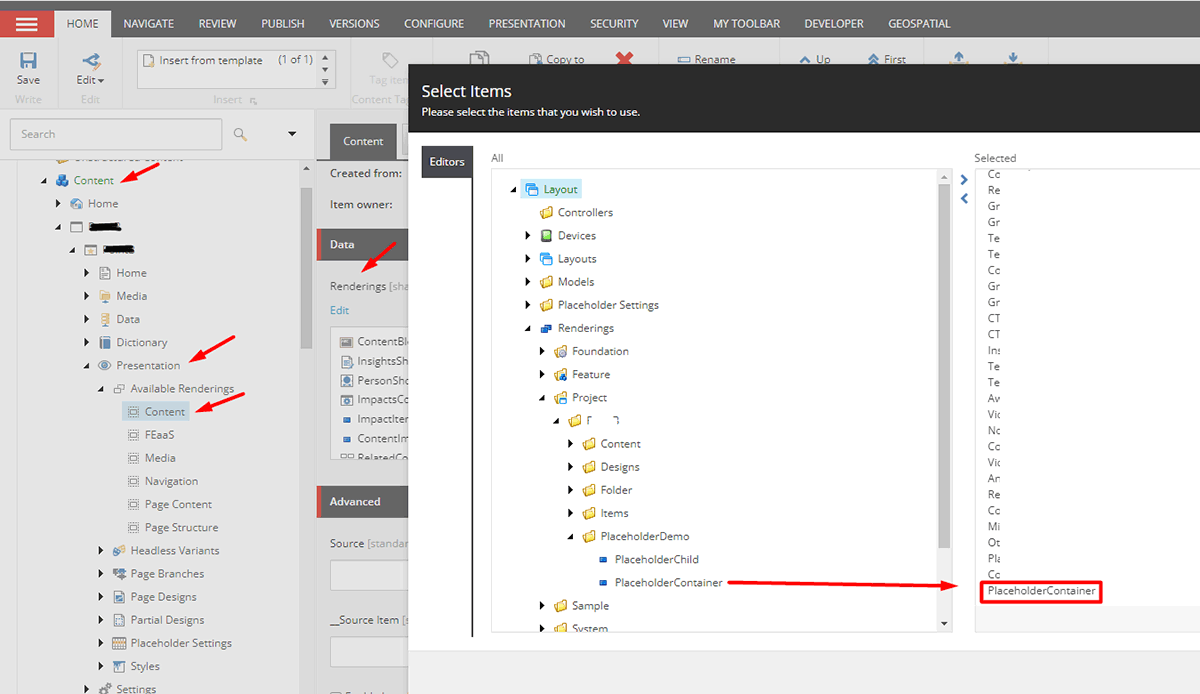
To illustrate the concept, we've created an additional rendering to represent the Child items that will reside within the placeholder and included this rendering in the Available Renderings section as well. This step ensures that our renderings are visible and usable on Sitecore Pages.
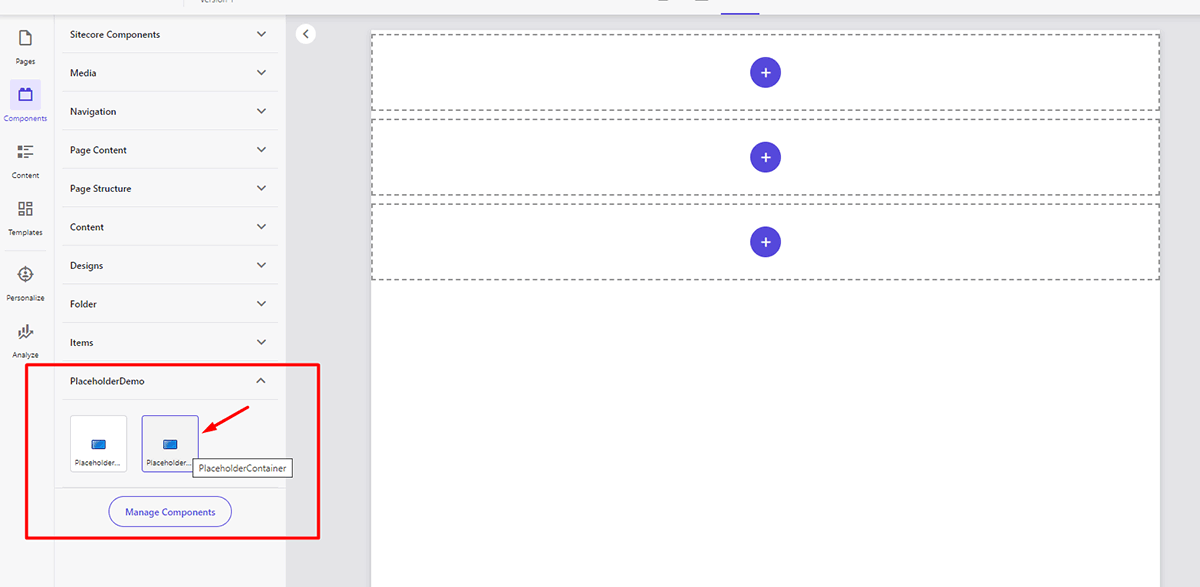
We must create a new page and drag & drop the PlaceholderContainer component into its main section. Here we'll see that the component within the placeholder works and is ready to host additional components inside.
Lastly, we can drag & drop the child component directly onto the placeholder and see how it contains and accommodates the child component.
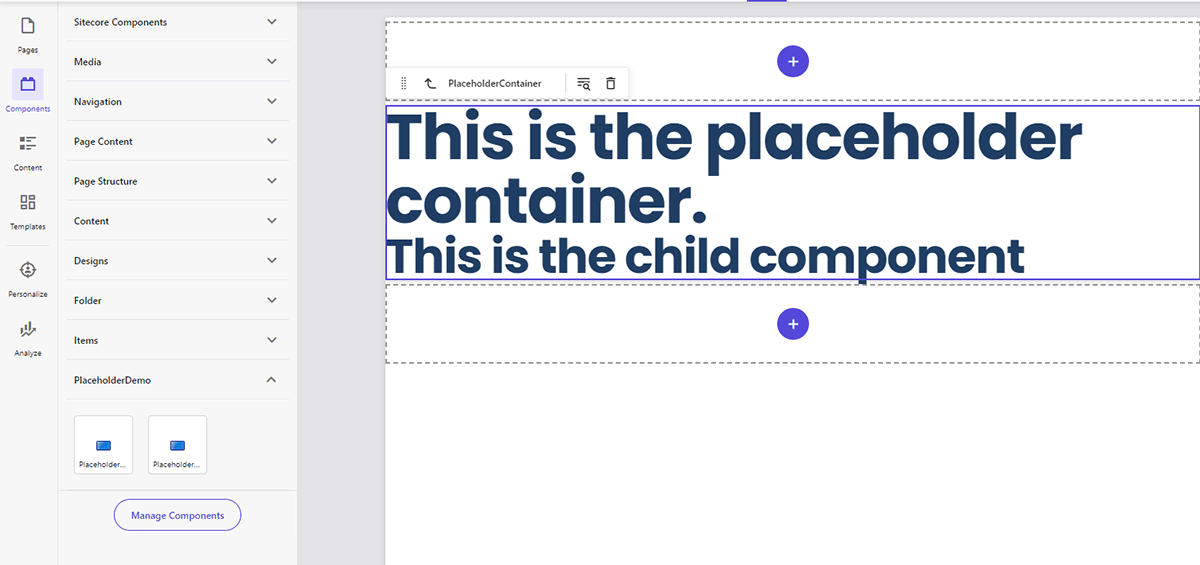
And there you have it! With these steps, placeholders are now operational on XM Cloud, Next.js, and Sitecore Pages.


