
.Net Source Code Quality Tools


Jun 20, 2012
Software quality is strongly connected with the source code quality. Coding standards may be very helpful in order to assure the high quality of the code, especially that they are supported by many applications tools. Now we are going to review some tools for checking the .NET source files.
As we are talking about .NET technologies, our first option would be to talk the Visual Studio Team Foundation System, due to its integration with the visual studio IDE and its flexibility managing and tracking the development activities across multiple branches. It allows to set-up a distributed and automated build process that quickly validates that every code check-in maintains product quality before the changes are committed to the sources repository.
Besides we have some other open source options we could use to ensure the code quality, the advantages of this approach are that we have a good cohesion with .NET tools and that we can use those tools for free.
There are different tools to work at any level of the development life cycle, due to our environment configuration we will use a Hudson’s plug-ins to check the code and get reports about the reported issues. Our Hudson environment is going to be configured to achieve the following goals:
- Get the source code from the Subversion repository.
- Build the project using MSBuild.
- Execute FxCop on an assembly and show warnings and a trend graph.
Download plug-ins
We used Hudson plug-ins in this document.
Plug-ins Installation
Once we have downloaded the plug-ins, the next step is to upload the .hpi files to install the plug-ins from outside the central plug in repository from the Advanced tab in Manage Plugins in the Manage Hudson main menu option. Then restart Hudson and the plug-ins are ready be configured and work.
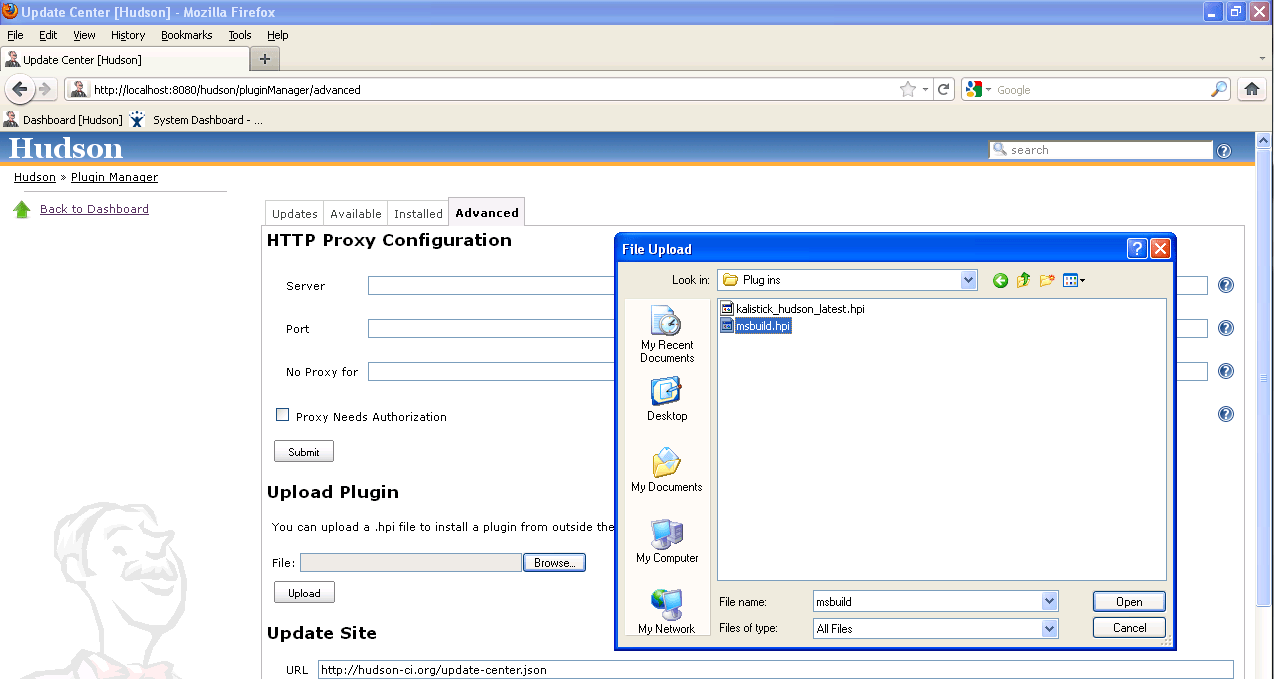
Setting up the Source Code Management
I have created a console solution in visual studio and uploaded it to SourceForge. Hudson supports CVS and SVN out of the box, but there are many other plug-ins we can use. After checking out the files from the repository, Hudson will show the new change sets since the previous build in the Build page. The Changes page contains a detailed view of changes sets such as the developer name, comments and the files that were changed.
To configure we have to access to the “Configure” page located in the project’s main menu.
Under the Source Code Management section, select Subversion option.
- Set the “Repository URL” field.
- Set the “Local Module Directory” to: “.”.
- Set the repository browser to its default option: “Auto”.
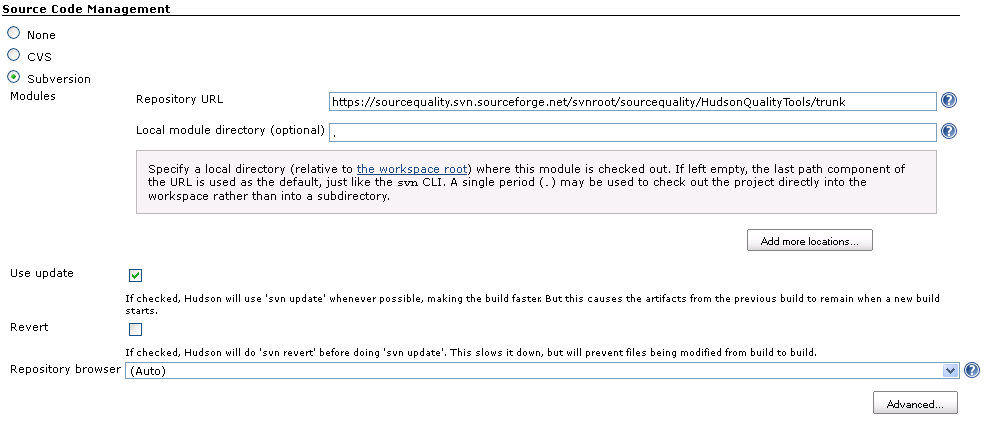
To test that this configuration is correct, save the changes and build the solution. The source code will be downloaded from the repository and then located into the Workspace. Accessing to the “Workspace” page, we can measure that the files had been checked out.
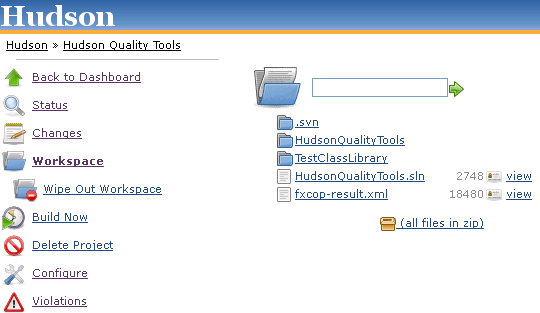
Configuring the Build
The next step is to build the solution using MSBuild. We can use any other plug-in we want to achieve this goal.
First, we have to set-up the plug-in so we can select the path where the .NET Framework is located. We will build this project using the .NET Framework 4.
- In Configure System page, localize the MSBuild Builder section and set the name and the path to MSBuild.exe where this tool has been installed:
- Name: MSBuild .NET Framework 4
- Path to MSBuild.exe:
C:\Windows\Microsoft.NET\Framework\v4.0.30319\MSBuild.exe
- After this, go to the Configure page in the project’s main menu and under the Build section, click on the Add build step button and then select Build a Visual Studio project or Solution using MSBuild.
- MSBuild Version: MSBuild .NET Framework 4
- MSBuild Build File:
HudsonQualityTools.sln. This is the name of the solution file we want to build. - Command Line Arguments:
/p:Configuration=Release. The parameters we want to use to build this solution. To read more information, go to MSBuild Command Line Reference.

To test those configurations, save the settings and build the solution. While the build is running you can check the console log that is updated as the build goes on.

There are several tools that allow Hudson to collect output from quality metric rules and then show them for every build and then the results can displayed in a trend graph.
When building a .Net Project, is recommended to use FxCop. This is a free static analysis tool from Microsoft that allows analyzing managed code assemblies against more than 200 different possible coding standards violations in the following areas:
- Correctness
- Library design
- Internationalization and localization
- Naming conventions
- Performance
- Security
Many of the issues concern violations of the programming and design rules set forth in the Design Guidelines, which are the Microsoft guidelines for writing robust and easily maintainable code by using the .NET Framework.
This tool could be useful to developers to adapt them and get used to the .Net Framework development best practices and coding standards.
To install this tool, you have to go to the Microsoft Windows SDK folder, generally located at %ProgramFiles%\Microsoft SDKs\Windows\v7.0A and find the FxCop folder that contains the installer.
Once installed, this tool offers both, graphical and command line interfaces, this last one is the one we will use as part of the automated build process.
Configuring FxCop in Hudson
Go to the project Configure page and under the Build section click the Add build step button and select Execute Windows batch command.
Fill in the command filed with the command parameters depending on how you like to execute the tool, as:
"%ProgramFiles%\Microsoft FxCop 1.36\FxCopCmd.exe" /file:"HudsonQualityTools\bin\Release\*.dll" /out:fxcop-result.xml /console
More information about the FxCopCmd and its parameters visit Using FxCopCmd.
This command will execute the FxCopCmd command and check the .dll files found in the Release folder. Besides it will record the results in a file named “fxcop-resul.xml” and display those results in the console.

To finish, check the Report Violations check box under the Post-build Actions and set the fxcop field to: fxcop-result.xml.
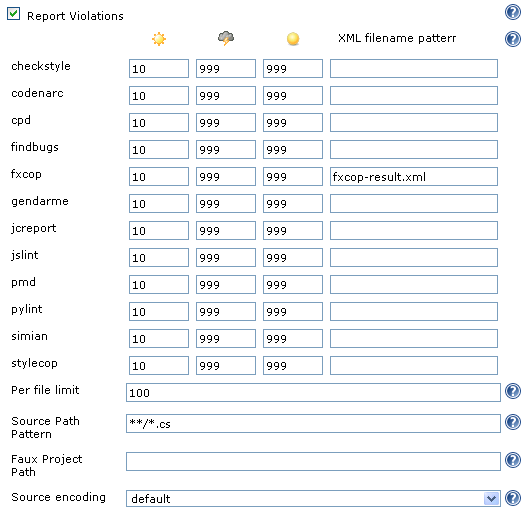
Save the changes and build the solution. Then check the Build to get a summary and check the state of the solution.
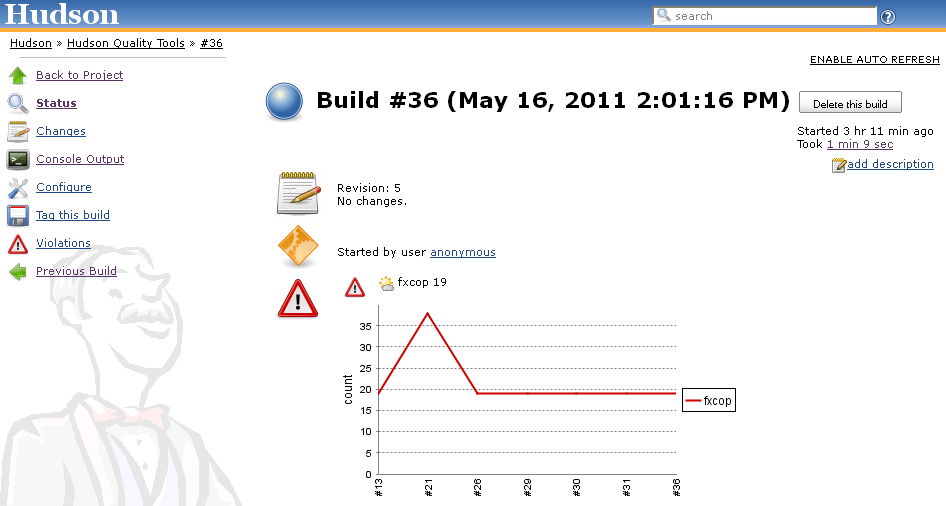
And then click on the graphic to get a more detailed version of the solution analyzed by FxCop.
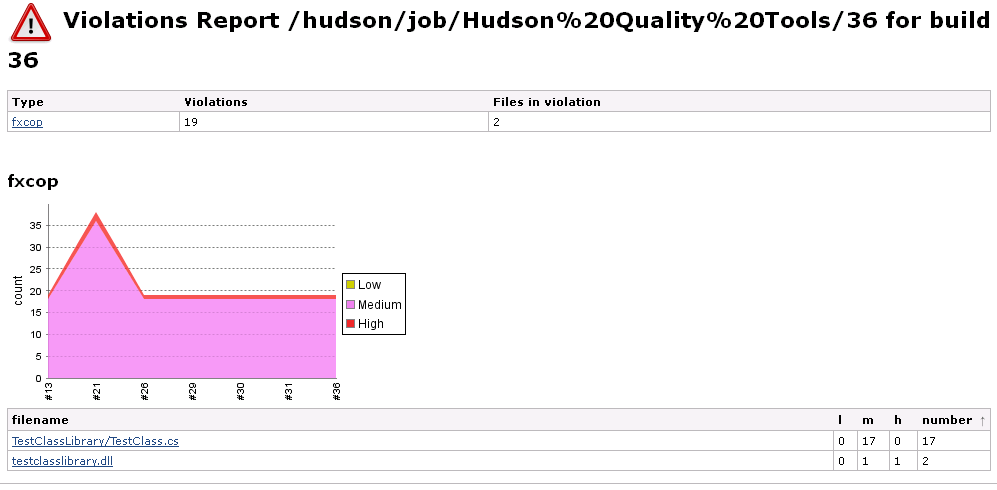
To step into the reported violations, click on any of the files listed on the lower part of the site.
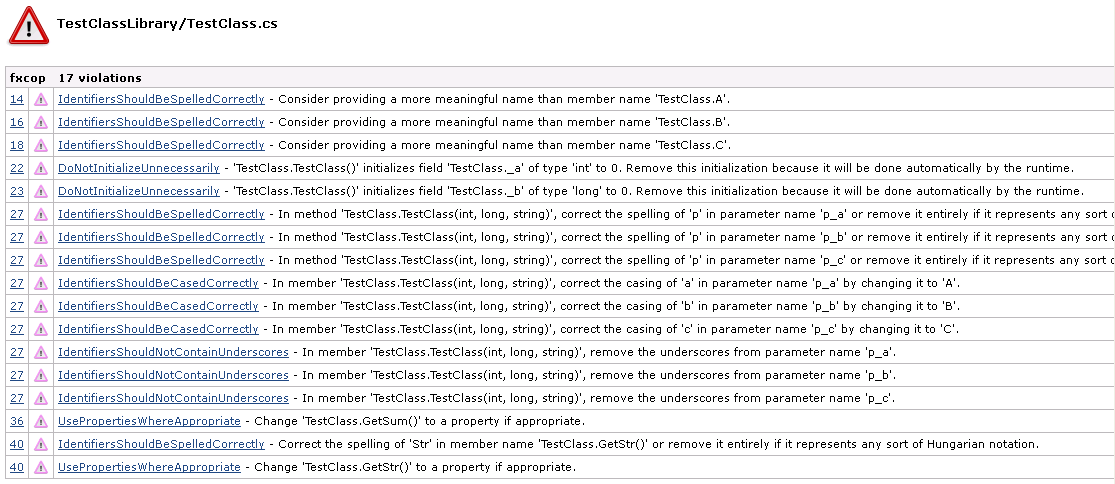
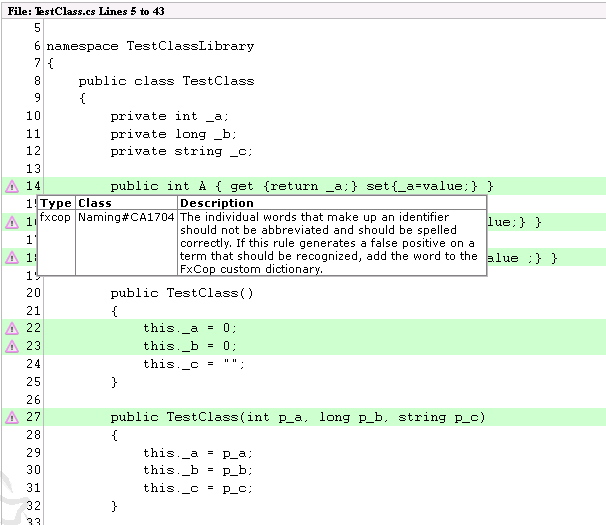
And there we will have access to the violations and the codes where it has occurred.
We can integrate Hudson to show those issues into an issue tracking solution as JIRA by installing the plug-in from the Plugin Manager and configuring it on the Manage Hudson menu option.
This allows the submitter and watchers to quickly find out which build they need to pick up to get the fix. Besides hudson can update JIRA issues with backpointers to builds by cheching the Update relevant JIRA issues check box under the Post-build Actions in the Configure section.

In conclusion there are several good tools in store to ensure the .Net source code quality along the entire software development process, and Hudson is one of them, having a vast variety of easy to install and use plug-ins to automate tasks and make the development process more efficient. As shown above, it does not take too much configuring effort to start building a project using Hudson. The best approach to measure the source code quality is to start building the project, and then focus on running unit tests and other quality metrics so you can monitor the quality progress on your project.
Recent Insights
-

-

-

 Fernando Torres
Tailwind CSS in Modern Web Development
Integration with AEM, Sitecore, and Optimizely
-


